Kedarkantha vs Hampta Pass Trek

Kedarkantha vs Hampta Pass Trek

Kedarkantha

Kedarkantha Trek and Hampta Pass Trek are both amazing treks in the Himalayas, but offer different experiences.

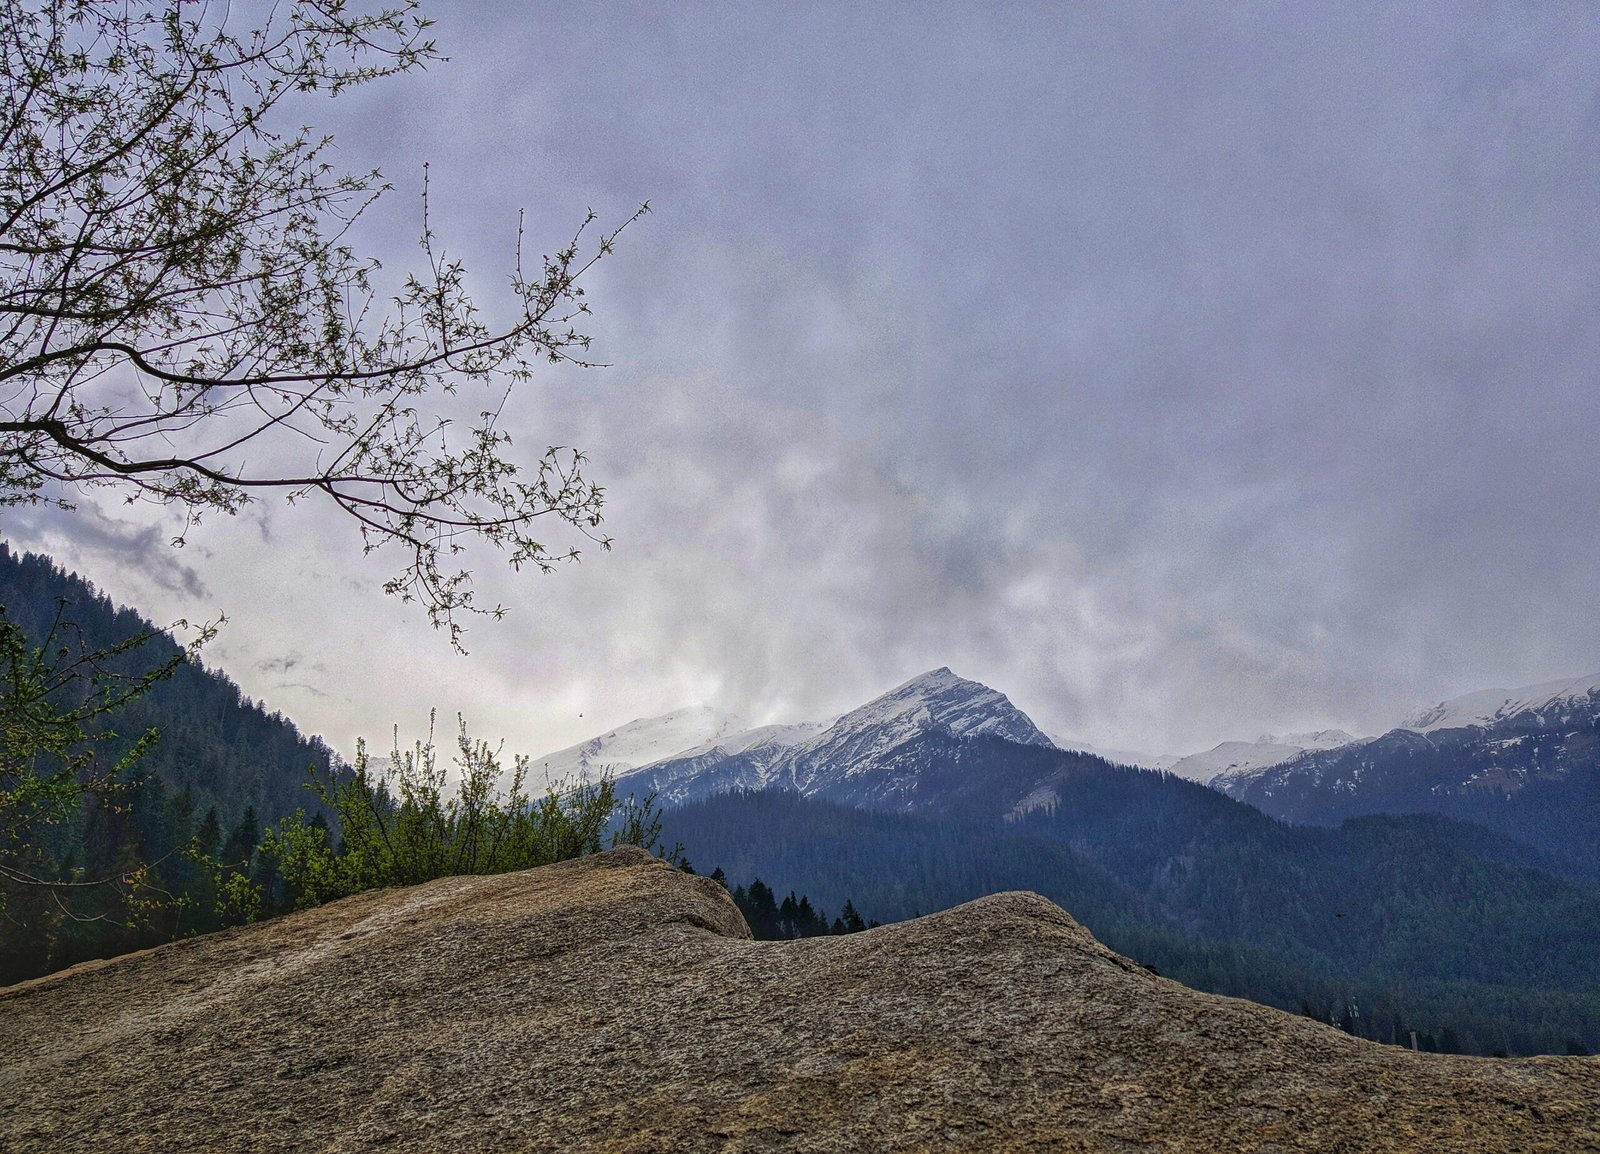
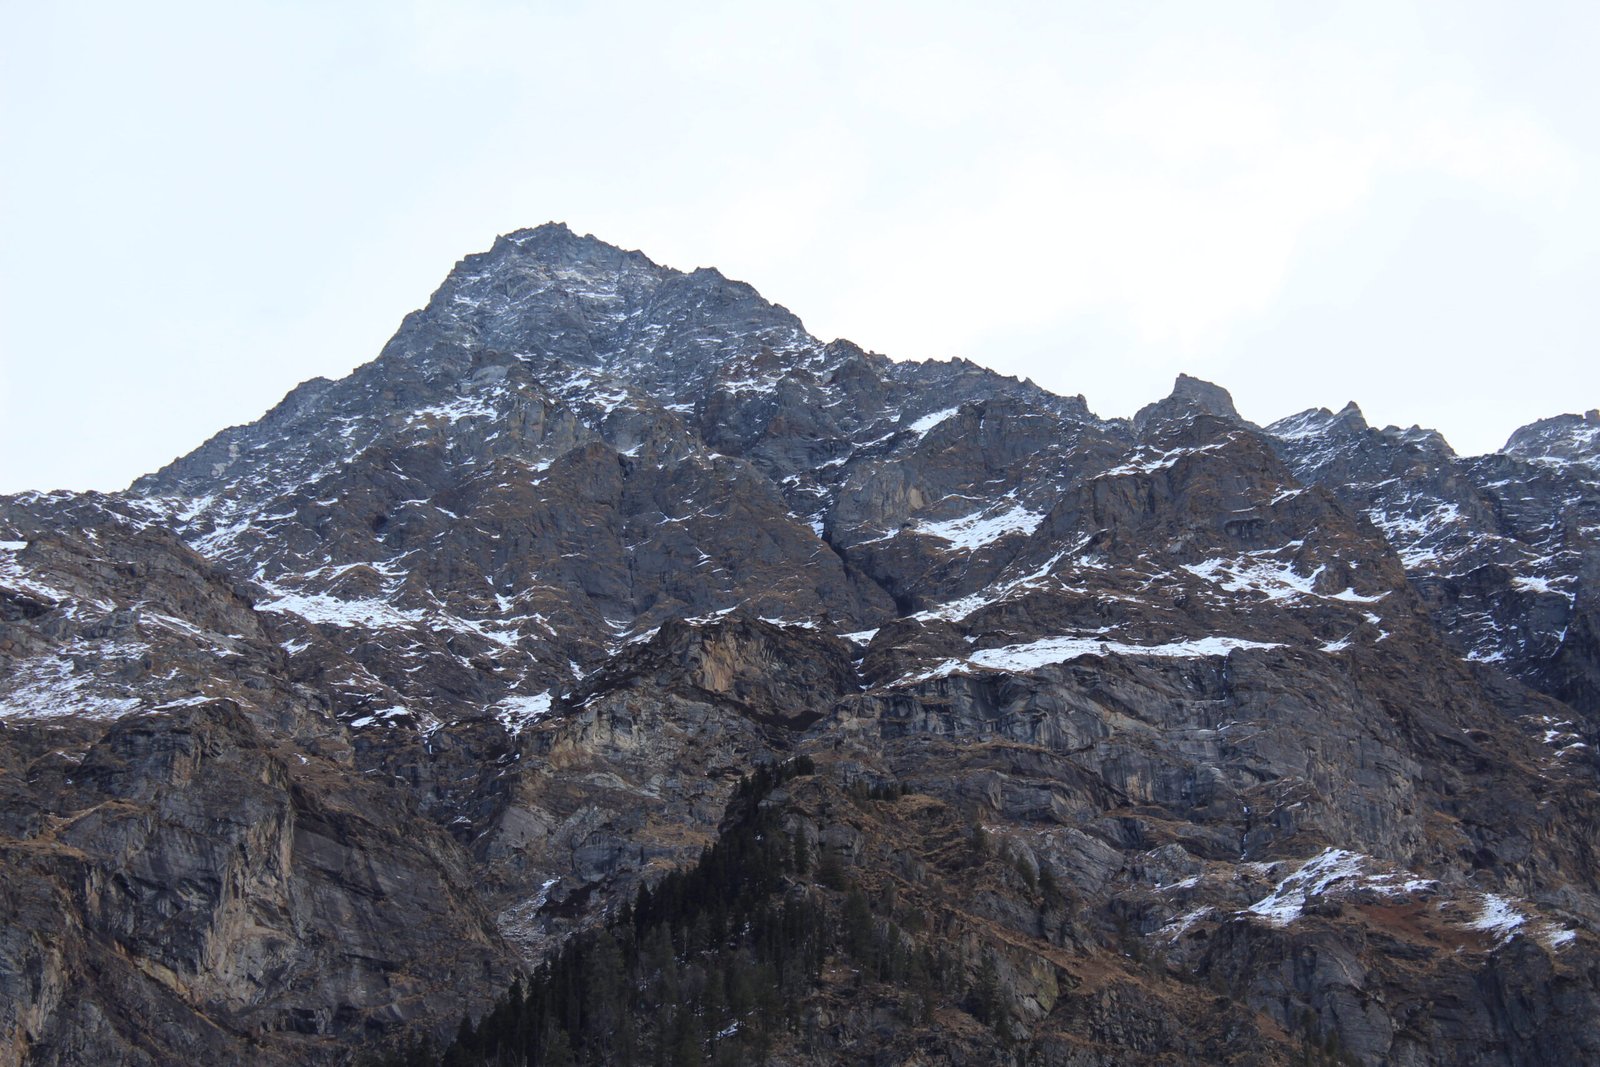
Kedarkantha Trek is located in the Garhwal region of Uttarakhand. It is an easy-to-moderate winter trek with snow-covered trails and pine forests, making it beginner-friendly. The trek is 12,500 feet high and usually takes 4 to 6 days to complete, making it perfect for first-time trekkers.

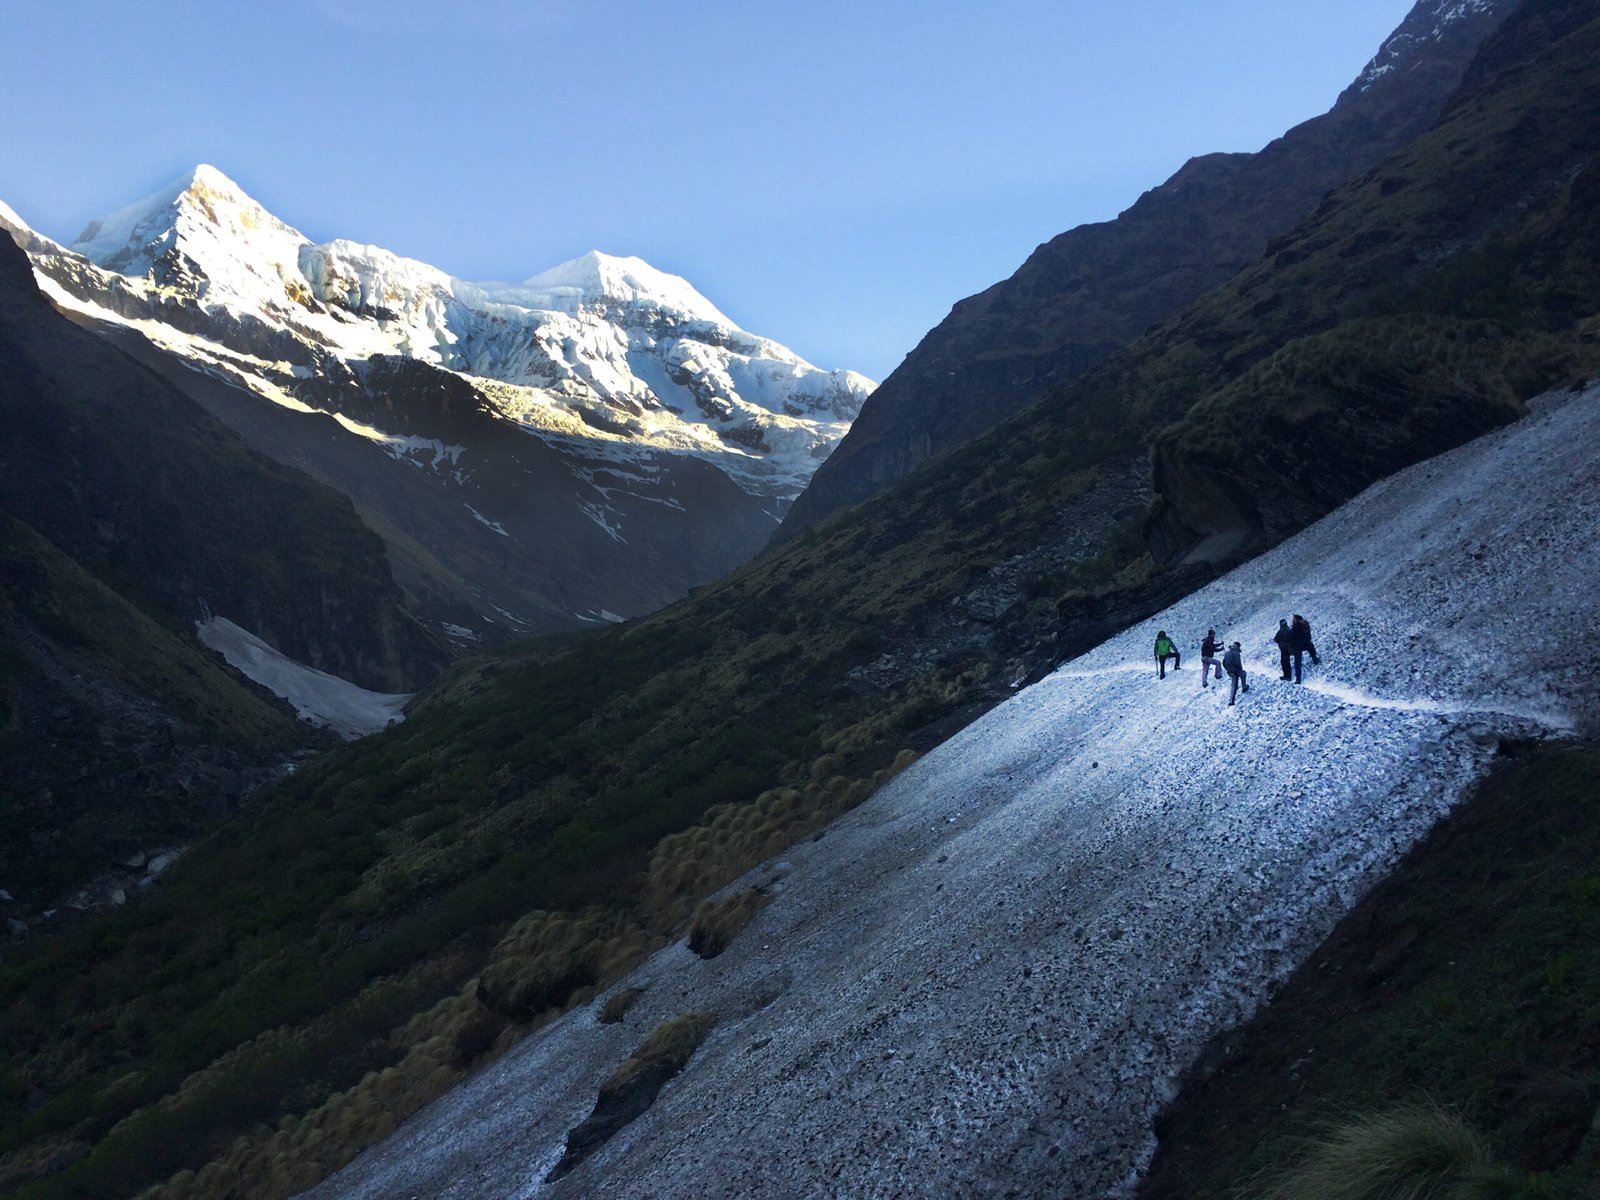
On the other hand, the Hampta Pass Trek is in the Kullu Valley of Himachal Pradesh. It is a moderate to difficult trek with green valleys, rivers, rocky paths, and the snow-covered Hampta Pass. The height is 14,100 feet, and it takes around 5 to 6 days, making it ideal for adventure lovers.

Kedarkantha is one of the best winter treks, with beautiful snow views and amazing sunrises. Hampta Pass, on the other hand, offers a mix of green valleys and snowy mountains during the summer and monsoon seasons. Kedarkantha is easy to access and has a lower risk of altitude sickness, but Hampta Pass can be more challenging and may cause altitude-related problems.

Your content goes here. Edit or remove this text inline or in the module Content settings. You can also style every aspect of this content in the module Design settings and even apply custom CSS to this text in the module Advanced settings.

What are the Kedarkantha Trek and the Hampta Pass Trek?

Hampta Pass Trek

If you love trekking in the Himalayas, you might wonder: Kedarkantha or Hampta Pass – which one is right for you? Let’s understand what makes each trek special.

Kedarkantha Trek – Located in the Garhwal Himalayas of Uttarakhand, it is known as one of the best winter treks in India. The trail is covered with snow, surrounded by pine forests, and offers stunning sunrise views from the Kedarkantha summit. If you’re looking for a beginner-friendly trek in the Himalayas, this is a great choice because it is easier and enjoyable.

Hampta Pass Trek – This is one of the most exciting trekking routes in Himachal Pradesh. The trek starts from Manali and goes towards the Lahaul and Spiti valleys. You’ll see lush green valleys on one side and the snow-covered Hampta Pass on the other. For those looking for an adventurous Himalayan trek, this is the perfect option.

Kedarkantha vs Hampta Pass: Quick Comparison

Feature

Kedarkantha Trek

Hampta Pass Trek

Height

12,500 ft (3,810 m)

14,100 ft (4,298 m)

Duration

4–6 days

5–6 days

Difficulty

Easy to Moderate

Moderate to Difficult

Best Time

December to April

June to September

Popularity

Famous for winter trekking

Famous for diverse landscapes

Which trek is better for you?

Hampta Pass Trek

If you are trekking for the first time, then Kedarkantha is the best choice! Snowy trails, pine forests, and easier paths make it perfect for beginners. Its lower difficulty level makes it ideal as a first Himalayan trek.

If you want more challenge and love diverse landscapes, then go for the Hampta Pass! You’ll experience green valleys, rivers, rocky trails, and reach the snowy Hampta Pass at 14,100 feet. And the best part? You can also visit Chandratal Lake at the end of the trek.

Kedarkantha vs Hampta Pass: Location and Accessibility

When comparing Kedarkantha and Hampta Pass treks, it’s natural to ask – which location is better? Which one is easier to reach? To fully enjoy the trekking experience, accessibility is an important factor. Let’s understand it in simple terms.

Personal Opinion

The feelings I had during my first trek were among the most memorable experiences of my life. While walking alone through nature, it felt like time had stopped. When I did the Kedarkantha Trek for the first time, it felt like I had entered a different world, walking on snow-covered mountain paths. The feeling of stepping on snow under the pine trees is something I can’t describe in words. And when I reached the summit and saw the sunrise, it felt like all the beauty of the world had come together in front of me.

The experience of the Hampta Pass Trek was completely different. First, I saw green valleys, then rocky paths, and finally, when the snow-covered trail began, nature seemed even more powerful. After crossing several rivers and rocky terrains, reaching near Chandratal Lake, which looked truly heavenly, was simply amazing.

Kedarkantha Trek: Located in Uttarakhand – How to Reach?


Kedarkantha Trek is located in the Garhwal Himalayan region of Uttarakhand and is very popular as the best winter trek in India. The base camp for the trek is Sankri village, which is about 200 km from Dehradun. Because Kedarkantha trek accessibility is easy, it is known as a beginner-friendly trek.

Kedarkantha Trek Location & How to Reach

1️⃣ Flight: The nearest airport is Jolly Grant Airport, Dehradun (for those coming from far away)
2️⃣ Train: Trains are available up to Dehradun railway station
3️⃣ Bus/Taxi: From Dehradun to Sankri, you can get private taxis or shared jeeps as Kedarkantha trek transport options

Why is the Kedarkantha Trek Best for Beginners?

Kedarkantha

Because Dehradun is well-connected to many major cities in India, and from there, you can directly reach the Sankri trek base camp by car. This ensures easy access to the Kedarkantha trek.

Hampta Pass Trek: Located in Himachal Pradesh – How to Reach?

Hampta Pass Trek is located in the Kullu Valley of Himachal Pradesh and is known as the best monsoon trek in India. The base camp for this trek is Manali, from where the Hampta Pass trek route begins.

Hampta Pass Trek Location & How to Reach

Flight: The nearest airport is Bhuntar Airport, Kullu (nearest airport for the Hampta Pass trek)
Bus: You can get a Volvo bus from Delhi or Chandigarh to Manali
Taxi/Local Transport: From Manali, you need to reach the Jobra trek starting point, which makes Hampta Pass trek accessibility a bit harder

Why is the Hampta Pass Trek Challenging?

Hampta Pass Trek

To reach Jobra, the starting point of the Hampta Pass trek, you need extra transport from Manali, which takes additional time.

Kedarkantha vs Hampta Pass Trek Accessibility: Which is Easier?

If you compare Kedarkantha trek vs Hampta Pass trek accessibility, Kedarkantha trek is easier because you can directly reach the base camp, Sankri, from Dehradun.
The Hampta Pass trek is more difficult in comparison because you need separate transport from Manali to Jobra, which takes more time.
If you want to reach the trek location easily, then the Kedarkantha Trek is more accessible.
If you’re looking for more adventure and want to explore Manali, then you can try the Hampta Pass trek route.

Kedarkantha vs Hampta Pass: Which Trek is Easier and More Suitable?

If you’re thinking about the Kedarkantha vs Hampta Pass trek difficulty level, then you need to know which trek is better for beginners and which one is more challenging. It’s important to understand how hard the trek is, what the trail is like, and how much risk there is of altitude sickness. Let’s understand it in simple words.

Trek Difficulty Level: Which is Better for Beginners?

Kedarkantha Trek has an easier difficulty level and is known as the best beginner-friendly Himalayan trek. The trail is wide and smooth, and you mostly walk on snow or grassy paths. Kedarkantha Trek is perfect for beginners because it has fewer steep climbs and is less tiring.

Hampta Pass Trek is more difficult because it is a moderate to difficult trek in the Himalayas. In this trek, you will walk on rocky terrains, face steep climbs, and cross rivers. That’s why the Hampta Pass Trek may be hard for beginners, especially for those doing a Himalayan trek for the first time.

  • Kedarkantha Trek Difficulty Level – Easy and perfect for beginners

Hampta Pass Trek Difficulty Level – Challenging and ideal for adventure lovers

Trekking Route Diversity: Snow, Rocky Paths, Forests, River Crossings, etc.

Hampta Pass Trek

Kedarkantha Trek Route Diversity – This trek is very beautiful! It has pine forest trails, a snow-covered Kedarkantha summit, open meadows, and gentle up-and-down paths. But there are no rocky paths or river crossings, so it’s easy. The most beautiful moment is the Kedarkantha sunrise view from the summit, which is amazing!

Hampta Pass Trek Route Diversity – This trekking route is full of variety and is truly the best crossover trek in India! First, you see the green Kullu Valley, then dense forests, followed by rocky terrain, then the snow-covered Hampta Pass at an altitude of 14,100 ft, and finally, the Chandratal Lake trek experience. On this trek, you have to cross multiple streams, which can be challenging for some people.

Kedarkantha Trek Scenery – Easy and peaceful environment, with beautiful snowy and forest trails.

Hampta Pass Trek Scenery – Rocks, rivers, snow, valleys—all together create an adventurous experience.

How Much Does Altitude Sickness Affect You?

Altitude Sickness in Kedarkantha Trek – Since Kedarkantha’s altitude is 12,500 ft (3,810 m), the risk of altitude sickness is very low. Some trekkers may feel a mild headache or dizziness, but usually, it goes away with rest.

Altitude Sickness in Hampta Pass Trek – Since Hampta Pass is at 14,100 ft (4,298 m), the risk is higher. Especially on the stretch from Hampta Pass to Chandratal, the sudden increase in altitude may cause breathing issues, nausea, or dizziness for many trekkers.

Kedarkantha Trek Altitude Sickness Risk – Low and easily manageable.

Hampta Pass Trek Altitude Sickness Risk – Higher, so acclimatization is necessary.

Which Trek Should You Choose?

  • If you are a beginner and want to do an easy trek with snow, then the Kedarkantha Trek is best for beginners.
  • If you want more adventure, a variety of landscapes, and a challenge, then the Hampta Pass Trek is best for experienced trekkers.

Kedarkantha vs Hampta Pass: Which Season Is Best for Which Trek?

When thinking about the Kedarkantha vs Hampta Pass trek, it’s important to know the difference in weather and seasons. Choosing the wrong season can affect your trekking experience. The best seasons for Kedarkantha and Hampta Pass treks are different because their weather conditions are opposite. So, let’s learn in simple words—which time is best for which trek?

Kedarkantha Trek: Why Is It Popular as a Winter Trek?

The best season for the Kedarkantha Trek is winter (December to April). During this time, the whole trek is covered in snow, and the Kedarkantha snowfall trek experience is truly amazing.

Why is winter best for the Kedarkantha Trek?

  • Winter trek in India: Snow-covered Kedarkantha peak and the surrounding natural beauty

  • Kedarkantha summit sunrise view: Stunning sunrise from the snow-covered peak

  • Kedarkantha trek snow trails: Amazing experience of walking through snow-covered paths inside pine forests

If you go during summer (April to June) or monsoon (July to September), there won’t be snow, but you will see green forests, mountains, and open skies. But for those who want a snow trek experience, the Kedarkantha trek in winter is the best.

Hampta Pass Trek: Why Are Summer and Monsoon Seasons Suitable?

The best season for the Hampta Pass Trek is summer and monsoon (June to September). During this time, you get to enjoy both the lush green Kullu Valley and the snow-covered Hampta Pass.

Why are summer and monsoon perfect for the Hampta Pass Trek?

  • Best monsoon trek in India: You can see both green valleys and snowy landscapes during the monsoon

  • Hampta Pass to Chandratal Lake trek: After crossing Hampta Pass, you get to enjoy the famous Chandratal Lake trek experience

  • River crossing in the Hampta Pass trek: In summer, snow melts, so you can enjoy river crossings and walking on rocky paths

In winter (November to May), Hampta Pass is fully covered in snow and the route is closed, so trekking is not possible. But if you want snow, you can do the Hampta Pass trek in June or early July, because some snow remains during that time.

What Will the Seasonal Experience Be Like?

Kedarkantha Trek Seasonal Experience:

  • Winter Trek (December – April): Snow-covered mountains, frozen trails, and the slow, magical feeling of walking on snow.
  • Spring & Summer Trek (April – June): Green forests, rhododendron flowers all around, and clear blue skies.

Hampta Pass Trek Seasonal Experience:

  • Monsoon Trek (June – September): A beautiful mix of snow and green valleys, small rivers, and waterfalls on the hills.
  • Winter (November – May): Not possible! The route is fully covered in snow and closed during this time.

Which Trek Is Best for Which Season?

  • If you love snow, then the Kedarkantha Trek in winter (December–April) is the best!
  • If you want green valleys, snow, and a more challenging trail, then the Hampta Pass Trek from June to September is perfect!

Kedarkantha vs Hampta Pass: Which Trek Has Better Views and Experience?

Hampta Pass Trek

When thinking about the Kedarkantha vs Hampta Pass Trek, it’s very important to consider their scenery and experience. These two treks offer very different types of natural beauty. Let’s see what kind of views you’ll enjoy on each trek, and which one is better for photography lovers.

Kedarkantha Trek: Pine Forest, Snowy Mountains, Beautiful Sunrise

The Kedarkantha trek looks like a winter wonderland! From the start, you’ll walk on snow-covered paths through thick pine forests, leading up to the snow-covered Kedarkantha summit.

  • Snow-covered trails & pine forest: The entire trail is covered with snow, and walking through the tall pine trees feels like a winter dream.

  • Kedarkantha summit sunrise view: When you reach the top and see the sunrise over the Himalayas, the snow-covered peaks glow with light—a perfect moment for photography.

  • Kedarkantha winter trek photography: If you love landscape photography, this trek is perfect. Snowy trees, sunrise views, and wide mountain scenery are all camera-worthy.

Hampta Pass Trek: Green Valleys, Rivers, Snow-Covered Pass, Chandratal Lake

The Hampta Pass trek offers mixed scenery—green meadows, rivers, snowy passes, and breathtaking Himalayan views. This trek takes you through many types of natural beauty.

  • Lush green Kullu Valley: This part has green meadows, cool waterfalls, and peaceful views from the Hampta Pass snow trek.

  • Hampta Pass & snow-covered peaks: After crossing the pass, you’ll find lots of snow, adding to the Himalayan snow trek experience.

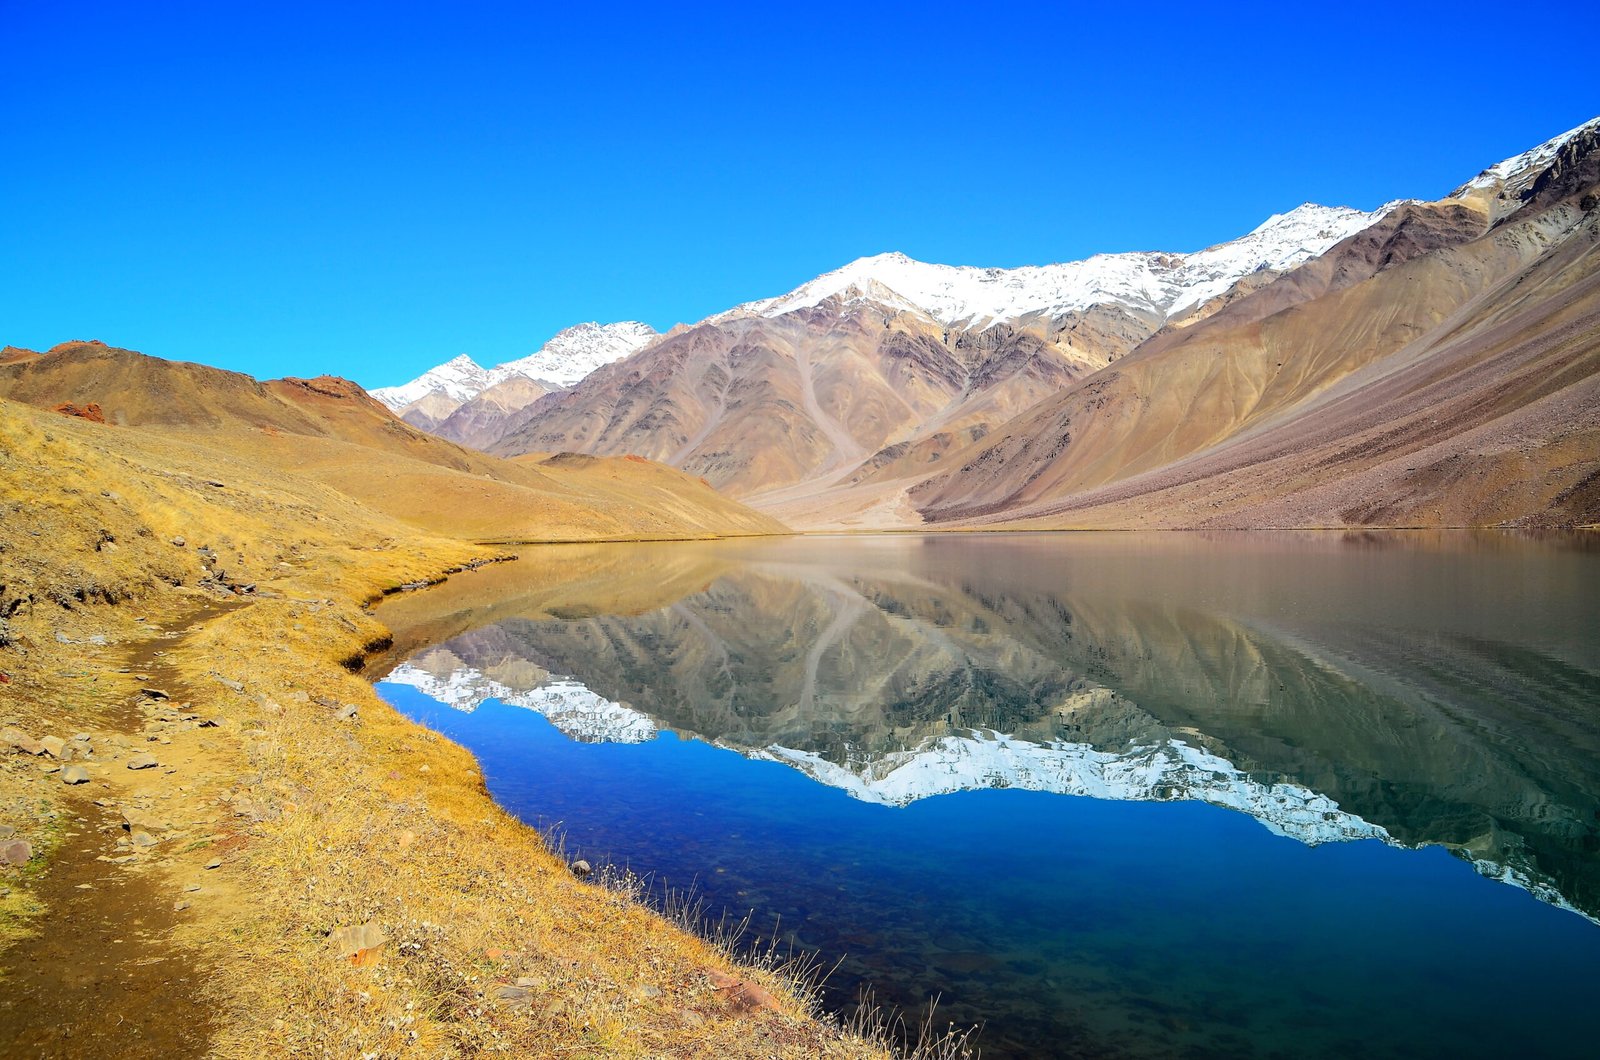
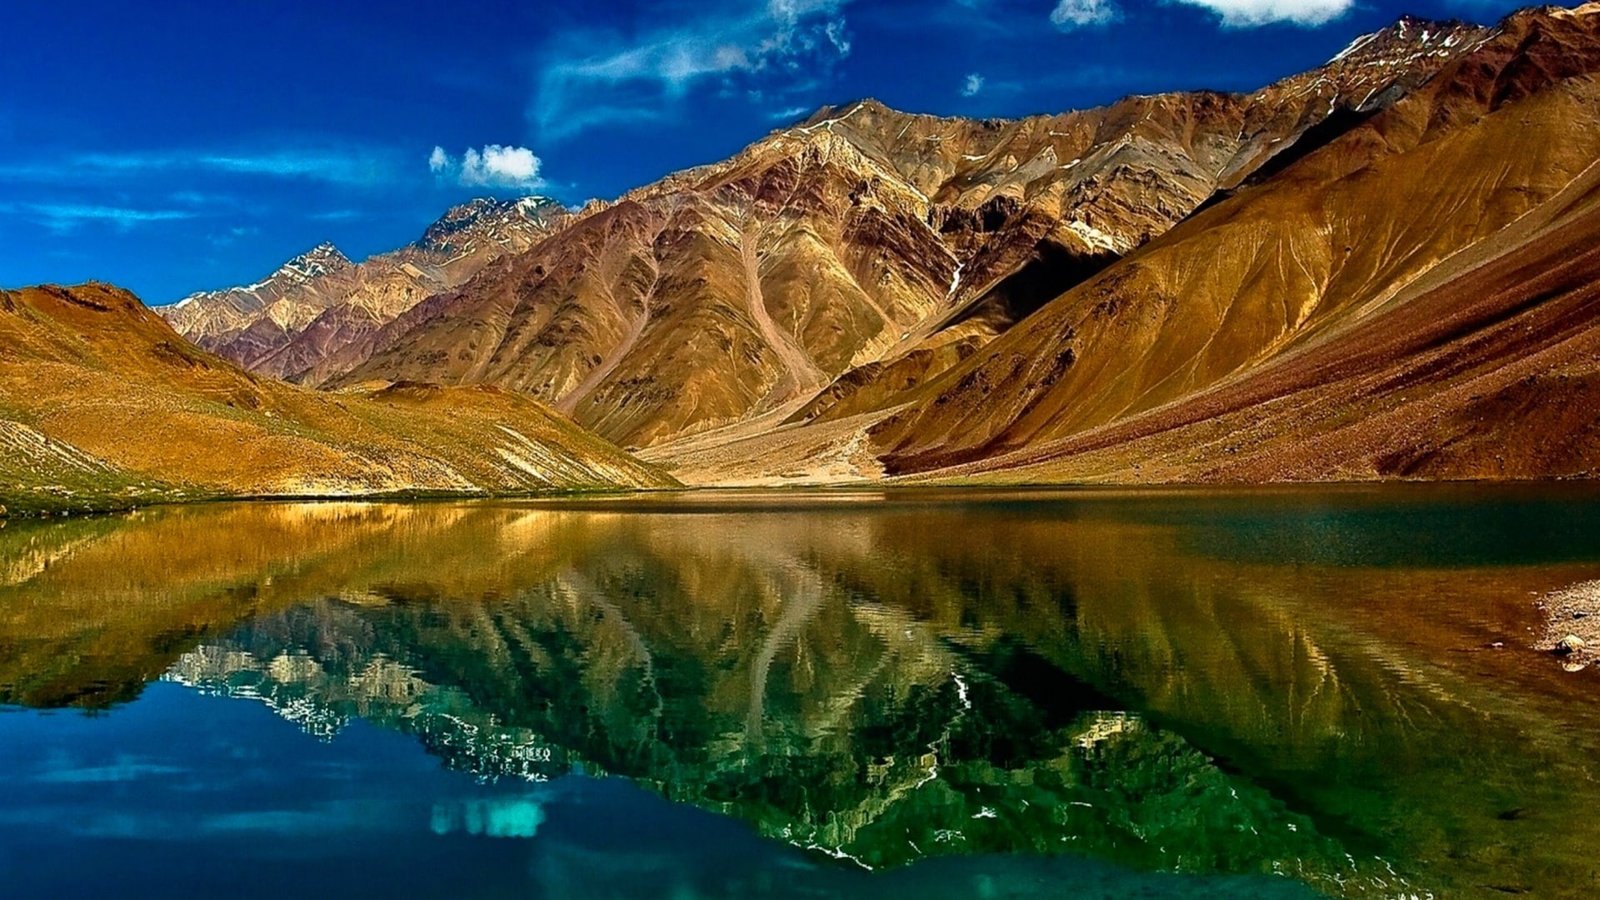
  • Chandratal Lake trek: Finally, you’ll see the beautiful, blue Chandratal Lake in the snow—it looks like a place from a fantasy world.

  • River crossing & rugged terrain: River crossings, rocky paths, and snowy sections make this trek a great chance for adventure photography.

Which Trek Is More Attractive for Photographers?

  • If you love taking photos of snow, pine forests, and sunrise, then the Kedarkantha Trek in winter is ideal.

  • If you enjoy photography of mixed landscapes, snowy peaks, Chandratal Lake, and adventure scenes, then the Hampta Pass Trek will be more exciting!

Kedarkantha vs Hampta Pass: Which Trek Is Harder and What Preparation Do You Need?

Kedarkantha

When choosing between Kedarkantha and Hampta Pass, it’s important to think about physical fitness and preparation. Both treks need different levels of effort.

Kedarkantha Trek: Difficulty and Preparation

The Kedarkantha Trek is a moderately easy trek, but in winter, walking on snow can make it a bit challenging. Some parts may be rocky or slippery, but if you walk slowly, it’s manageable.

  • Fitness required: Do cardio exercises like running or cycling to build stamina. Also, practice stair climbing and squats to strengthen your legs.
  • Gear to bring: You must carry winter trekking gear—thermal jacket, waterproof trekking shoes, backpack, gloves, and warm clothes. Also, bring a headlamp and water bottle for night trekking and hydration.

Hampta Pass Trek: More Challenging and What You Need

The Hampta Pass Trek is a bit tougher because of the steep and rocky sections. It is considered a moderate to difficult trek and requires better fitness.

  • Fitness required: Do stair climbing and hill walking to strengthen your legs. Add cardio workouts and endurance training to handle long walks and physical effort.
  • Gear to bring: You’ll need proper trekking gear—waterproof shoes, windproof jacket, quality backpack, trekking poles, sleeping bag, and thermal clothes. Als,o carry quick-dry clothes and a rain cover, especially if you’re trekking during the monsoon.

Overall Effort and Preparation Differences

If you’re thinking about the Kedarkantha Trek vs the Hampta Pass Trek, let me tell you that the Hampta Pass is a bit more challenging. Even though Kedarkantha is a winter trek with snow, most of its trail is smooth. But the Hampta Pass has more rugged terrain and steep paths. So, if you’re a beginner, Kedarkantha may be easier to start with. Still, with proper preparation, the Hampta Pass can also be done step by step.

For the Kedarkantha Trek, you need to focus on fitness, strengthening your legs, preparing for winter, and carrying the right gear.
For the Hampta Pass Trek, you need to build endurance and strength, and carry special gear like trekking poles, a sleeping bag, and waterproof jackets.

Kedarkantha vs Hampta Pass: Which Trek Is Budget-Friendly?

When comparing these two treks, cost and budget are important. So let’s check the approximate costs to help you decide which one fits your budget.

Kedarkantha Trek: Cost & Budget

Kedarkantha is a budget-friendly trek, especially as a winter trek, and many trekking agencies offer packages.
The cost is generally ₹5,000 to ₹10,000 per day, including a guide, transportation, meals, a sleeping bag, and a tent.

Guide & Package Cost:

Packages usually include guide services, transport, and food. Costs can be lower if you go in a group, but may be higher if you go solo.
Still, it’s a popular and budget-friendly option.

Hampta Pass Trek: Cost & Budget

Hampta Pass is a bit more expensive because it’s longer and more challenging.
The cost is generally around ₹7,000 to ₹12,000 per day, including a guide, transportation, meals, and camping gear.

Guide & Package Cost:

Most packages include a guide, transport, food, and high-quality gear.
But there may be extra costs for trekking poles, waterproof jackets, etc., which can increase the budget.

Which Trek Is Budget-Friendly?

If you’re looking for a budget-friendly trek, then Kedarkantha is a better option.
It’s cheaper and very popular as a winter trek.

However, if your budget is a little higher and you want an adventure trek, the Hampta Pass could be perfect.
If your budget is tight, go for Kedarkantha. But if you’re looking for diverse landscapes and challenging trails, and are okay with spending a bit more, then Hampta Pass can be an amazing experience.

Which Trek Is Best for You? (Kedarkantha vs Hampta Pass Trek)
Kedarkantha

When comparing Kedarkantha and Hampta Pass, you might wonder—which trek is best for you?
The answer depends on your trekking experience, interests, and preparation. Let’s find out which trek suits whom:

Best for Beginners

If you’re a beginner and going on your first trek, Kedarkantha is ideal.
It has a moderate difficulty level, clear trekking paths, and shorter distances, making it easier.
Especially as a winter trek, it’s great for seeing snow-covered landscapes.

Why Kedarkantha is Best:

It’s beginner-friendly, with snowy trails and peaceful surroundings.

Best for Adventure Lovers

If you’re an adventure lover, Hampta Pass is perfect.
It has rugged terrain, steep climbs, and challenging passes that bring new excitement.
You’ll pass through lush valleys, high-altitude lakes, and snowy peaks that make the trek thrilling.

Why Hampta Pass is Best:

It’s a challenging trek with high-altitude trekking and rugged routes for adventure seekers.

Best for Nature Photographers

If you’re a nature photographer and want to capture beautiful natural scenes, Hampta Pass is the best.
It has diverse landscapes, lush valleys, glacial lakes, and snowy peaks—a dream for your camera!
Still, Kedarkantha also has beautiful snow-covered mountains and pine forests for photography.

Personal Safety Tips

When trekking or hiking in mountainous or remote areas, following some important safety tips is very important.

  • Check weather forecasts before your trip. The weather can change quickly in the mountains, especially with snow.

  • Be prepared for cold temperatures that can cause health issues.

  • Carry quality shoes, clothes, and essentials like water, snacks, a first-aid kit, a solar charger, a headlamp, and sunscreen.

  • Respect the environment—don’t harm plants or animals, and always follow the trail.

  • Take extra time for mountain routes as they often take longer.

  • Don’t go alone—travel with partners or take help from local guides.

  • Be aware of Altitude Sickness (AMS). If you feel breathless, tired, or have a headache, take a rest.

  • Respect local culture and traditions, as many people in these areas value their heritage.

  • Lastly, for safety, taking help from an experienced guide or local expert is very useful.

By following these tips, your trekking or hiking experience will be safe and enjoyable.

Markha Valley Trek in Ladakh

Markha Valley Trek in Ladakh

Markha Valley

The Markha Valley Trek is one of the most beautiful and popular trekking routes in Ladakh. It mainly passes through Hemis National Park in the Ladakh region of India, where trekkers can experience natural beauty, high mountain peaks, and local culture. This trek usually takes 6 to 8 days, and along the way, trekkers pass through villages and camping spots like Chilling, Skiu, Markha, Hankar, and Nimaling.

The main reason for the popularity of the Markha Valley Trek is its diverse natural scenery and trekking experience. On this route, trekkers see snow-covered mountains on one side and green valleys and Buddhist monasteries on the other. Also, several small rivers must be crossed along the way, which makes the trek more challenging and adventurous. Because of the high altitude, this trek is considered moderate to difficult, but with proper preparation, the experience is truly amazing. That’s why trekkers from India and abroad come here every year.

Route and Map of Markha Valley Trek

The trek starts from Leh, the capital of Ladakh. Usually, trekkers first go to a village called Chilling, where the trek begins. Completing the trek usually takes 6 to 8 days, depending on the trekker’s speed and the weather.

This route has several important stops where trekkers rest and enjoy the surrounding nature. On the first day, trekkers reach Skiu, a beautiful village by the river. Next, they reach Markha, the main settlement of the valley. After Markha comes Hankar, where trekkers can see some old monasteries and mountain trails. Then, the trek reaches its highest region, Nimaling, a high-altitude grassland. Finally, the trek ends at Kongmaru La Pass, which is about 5,200 meters high, and from here, trekkers can see an amazing view of the snow-covered mountains.

To understand the trek route, you can use Google Maps, which will help you locate each stop. Checking the map before the trek enables you to get a better idea of the roads and makes planning easier.

Best Time for Markha Valley Trek

Markha Valley

The best time to do the Markha Valley Trek is from May to September. During this time, the weather in Ladakh is relatively stable, daytime temperatures are comfortable, and nights are not too cold. Also, snow begins to melt, river flow becomes manageable, and the paths are safe for trekking. In summer, the nearby mountains are covered with green plants, which makes the whole trekking experience more beautiful.

How Dangerous Is It to Trek in Winter?

In winter, especially from November to March, doing the Markha Valley Trek can be very dangerous. The temperature can drop to -20°C, which makes trekking extremely difficult due to the cold. Walking on snow-covered roads becomes hard; sometimes, the trek route gets blocked by snow, and food and water become harder to find. Also, due to the altitude, the lack of oxygen becomes more noticeable, increasing the risk of altitude sickness. So, without proper preparation and experience, trekking in winter is not safe at all.

Permits and Permission for Markha Valley Trek

To do the Markha Valley Trek, certain permits and permissions are needed because the area is a protected zone and goes through Hemis National Park. Indian and foreign tourists both need to get an Inner Line Permit (ILP), which is a special permission approved by the Ladakh administration. This permit can be collected from the DC Office in Leh, or it can be applied for online.

Foreign nationals have a few extra rules. They must submit copies of their passport and visas, and usually, they are not allowed to go to sensitive border areas. Indian tourists can get the permit more easily, but they also need to show ID proof while applying. There is usually a fee for the permit, which is used for the conservation of the national park.

If someone is traveling through a trekking agency or with a guide, they usually take care of the permits. But those doing solo trekking must get the permission on their own and follow the rules. Trekking without a permit can lead to trouble with local authorities, so it’s important to get the permit in advance.

How to Reach Markha Valley Trek

Markha Valley

To do the Markha Valley Trek, you first have to reach the city of Leh, which is the main city of Ladakh and the gateway to the trek. There are mainly two ways to reach Leh—by flight or by road trip.

Ways to Reach Leh:

By Flight: Leh has an airport called Kushok Bakula Rimpochee Airport. Direct flights are available to Leh from major Indian cities like Delhi, Mumbai, Chandigarh, and Srinagar. This is the easiest and fastest way to get there.

By Road Trip: If you love long drives and adventure, you can reach Leh by car or bike through the Manali-Leh Highway or the Srinagar-Leh Highway. However, these roads remain open only during certain months due to snow and weather conditions (usually May to September).

Transport from Leh to the Trekking Point

To start the Markha Valley Trek, you usually need to go to a village called Chilling. From Leh to Chilling, you can take a shared taxi, private cab, or rent a bike. The trek begins from Chilling, and the first destination is the village of Skiu.

Some people also start the trek from Spituk, but the Chilling route is the most popular and convenient.

If you want to travel more easily, you can take help from trekking agencies or local tour operators, who can arrange the transport for you.

Personal Opinion

The Markha Valley Trek in Ladakh was one of the most challenging and enjoyable trekking experiences of my life. This trek goes through the mountainous areas of Ladakh, where the high peaks, quiet gorges, and unique alpine villages leave a deep impression on your mind.

When I first started, I thought I could finish it easily. But while walking on rocky roads, struggling with breathlessness due to high altitude, and fighting the cold, I realized how challenging it was.

However, the thing that impressed me the most was the natural beauty. The whole trek was beautifully adventurous, especially Markha village and the scenic views of that area. Every step felt like a discovery!

But at one point, when the cold suddenly increased, I realized that without proper preparation, nothing is possible on this trek. Going in winter doesn’t just mean bearing the cold—you also need mental strength and preparation.

From this experience, I learned that trekking should never be taken lightly. A few days ago, I slipped on a stone and got hurt a little, so from then on, I was fully careful all the time. One day, when we crossed the Ganda La Pass, I felt very proud of myself because we had reached our destination after overcoming such a tough challenge.

I would even advise others that those who want to do this trek should have very good physical fitness and use good-quality trekking gear. Don’t forget to carry enough food and water, because in the vast open areas of Ladakh, you have to walk a lot and your body needs energy.

Markha Valley Trek Experience and Difficulty

Markha Valley

Markha Valley Trek is a moderate to difficult level trek, which requires some experience and physical fitness. The whole trek takes about 6–8 days, and you have to cross several high mountains, rivers, and rocky paths.

Since this trek is in the Himalayan region of Ladakh, you may face a lack of oxygen and altitude sickness at some places.

Is This Trek Suitable for Beginners?

If someone is a completely new trekker, this trek might be a bit difficult in the beginning. But if the trekkers are physically fit and prepared, and get used to the high altitude slowly, then it is possible to complete the trek successfully.

For beginners, it’s important to walk slowly, take enough rest, and give themselves time to adjust.

How to Avoid Altitude Sickness

Due to high altitude, many trekkers may feel headaches, nausea, shortness of breath, or tiredness, which is known as Altitude Sickness. To avoid this, follow these important steps:

  • Spend at least 2 days in Leh to get used to the height (acclimatization).

  • Drink enough water and keep your body hydrated.

  • Walk slowly and avoid climbing too high in a single day.

  • Avoid alcohol and smoking.

  • If needed, take altitude-related medicine (like Diamox).

With the right preparation and caution, the Markha Valley Trek can be an amazing experience and create great memories for a trekker.

Stay and Food on the Markha Valley Trek

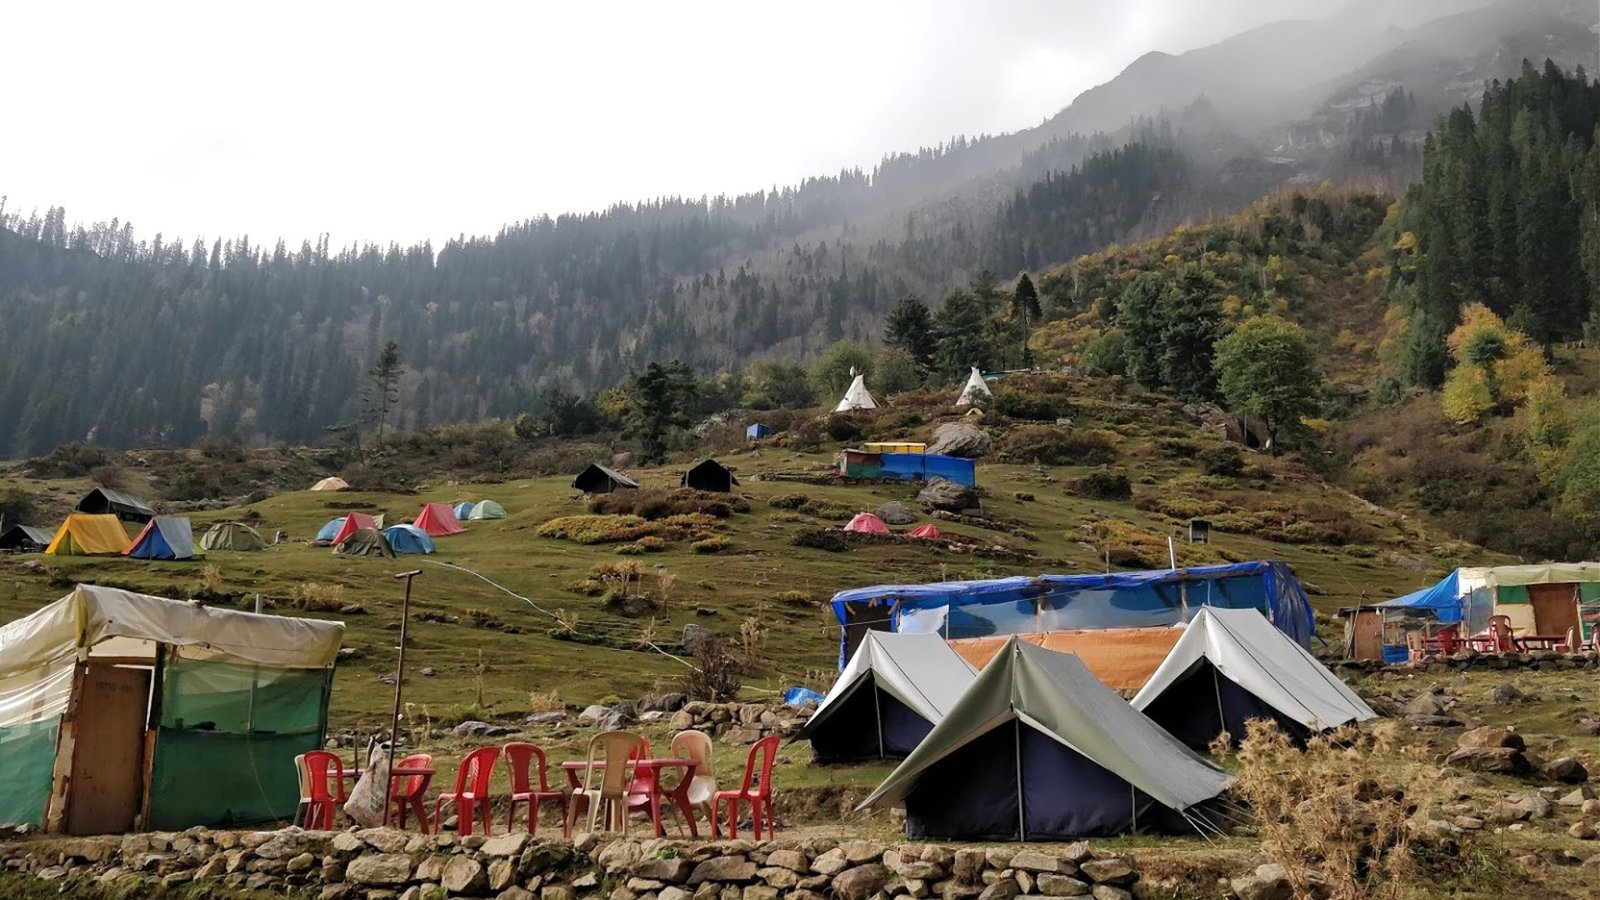
During the Markha Valley Trek, trekkers mostly stay in either camping tents or homestays. Since it’s a long trek, there are no fixed hotels or luxury stay options on the way. However, local villagers offer homestays (a place to stay in their homes), which make the trekking experience more enjoyable.

Camping and Homestay Options

Those who want to spend the night close to nature can bring their tents and camp. But most trekkers stay at homestays in the villages, where they get basic accommodation and food. The homestays are usually simple, but they provide warm blankets, meals, and necessary items for a comfortable night.

Brief About Local Food

On the way during the Markha Valley Trek, trekkers can get simple and healthy food from villagers. Mostly, Tibetan and Ladakhi food is served, including:

  • Thukpa – a popular noodle soup

  • Momo – stuffed dumplings

  • Barley bread and butter tea – common local items

  • Dal-rice and vegetables – simple but nutritious meals

Since food options are limited in this region, trekkers are advised to carry some dry food, chocolates, or energy bars with them. This helps avoid tiredness and worrying about meals during the trek.

Essential Gear and Preparation for the Markha Valley Trek

Markha Valley

To complete the Markha Valley Trek successfully, having the right gear and preparation is very important. As this is a long and medium-difficulty trek, you should carry comfortable clothes, good trekking boots, medicines, and other important items.

Clothing:

The weather in Ladakh can change quickly, so wearing multi-layered clothes is a smart choice.

  • Thermal innerwear (for warmth)
  • Full-sleeve T-shirts and light jackets (for daytime)
  • Woolen or down jackets (for cold nights)
  • Trekking pants and windproof pants
  • Gloves, mufflers, and caps (to protect from the cold and the sun)

Trekking Gear:

  • Good quality trekking boots (with strong soles for rocky paths)
  • Backpack (50–60 liters) (to carry all essentials)
  • Trekking pole (for balance on slopes)
  • Sunglasses and sunscreen (sunlight is strong at high altitudes)
  • Rain cover or poncho (useful in case of sudden rain)

Medicines and Personal Items:

  • Diamox tablets (for low oxygen levels)
  • Light painkillers
  • Bandages, antiseptics, and a first aid kit
  • Water purification tablets
  • Energy bars and dry food

With the right gear and preparation, the Markha Valley Trek becomes easier and more comfortable, and you can avoid any problems during the trek.

Personal Recommendation

The Markha Valley Trek was one of the most challenging but beautiful experiences of my life. When I went for this trek in Ladakh, I realized that not just physical fitness, but also patience and preparation are very important.

First of all, I must say that due to the altitude, you might feel dizzy, tired, or short of breath, so you should climb slowly. From my experience, if you don’t drink enough water, you get tired quickly. So, it’s important to keep water and light food with you along the way.

I also took plenty of rest, especially while climbing higher areas, so that my body wouldn’t get over-stressed.

Taking a guide was also a good decision because the route is quite confusing in some places. The guide gave me a sense of safety. Walking beside the Kulung River, resting at support camps, and respecting local culture were all very important.

So, for those who want to do this trek, if you prepare well and stay cautious, the whole journey will truly become unforgettable.

A Grand Himalayan Odyssey: Exploring Leh Ladakh, Spiti, Kashmir, Goa, and Himachal

A Grand Himalayan Odyssey: Exploring Leh Ladakh, Spiti, Kashmir, Goa, and Himachal

A Grand Himalayan Odyssey Exploring Leh Ladakh, Spiti, Kashmir, Goa, and Himachal

Planning a once-in-a-lifetime journey through India’s most majestic landscapes? This grand adventure brings together the stunning terrains of Leh Ladakh, the raw beauty of Spiti Valley, the timeless charm of Kashmir, the coastal magic of Goa, and the colonial elegance of Shimla-Manali. Here’s a complete guide that covers major destinations, treks, food, and travel tips across all these regions.

Leh Ladakh Highlights

A Grand Himalayan Odyssey Exploring Leh Ladakh, Spiti, Kashmir, Goa, and Himachal

Start your journey with an amazing view of Leh City, visiting iconic landmarks like Thiksey Monastery, Rancho’s School, and Leh Palace. Take a third-day trip to Magnetic Hill and Sangam Point to witness nature’s strange and beautiful phenomena.

Adventure lovers can explore the Markha Valley Trek in Ladakh, the terrifyingly beautiful landscapes of Umling La (the highest motorable road), and travel from Khardung La to Nubra Valley. Don’t miss the breathtaking Pangong Lake, often described as “created by God’s hands”.

Experience the cultural side of Ladakh with the Tibetan prayer flags, Chadar Trek on the frozen river, and local stays at Merak Hotel, Homestays, and Cottages. For food lovers, both vegetarian and non-vegetarian restaurants serve delicious meals.

Get all practical details from our Ladakh travel road map, travel plan, hotels & food guide, including river rafting tips, appropriate clothing suggestions, and renting bike accessories. Traveling with kids, pets, or the elderly? We have special guides for families with asthma or high blood pressure, too.

Spiti Valley Adventures

A Grand Himalayan Odyssey Exploring Leh Ladakh, Spiti, Kashmir, Goa, and Himachal

Spiti Valley is a land of extremes—known for its bike tours in extreme cold, rugged winter landscape, and road plans from Manali to Spiti. Must-visit places include Kunzum Pass, Chandratal Lake (also a trek & camping spot), Losar village, Langza fossils, Kibber for snow leopard sightings, Hikkim (the world’s highest post office), and Chicham Bridge (Asia’s highest).

Learn about Spiti’s cultural festivals, best hotels, weather, and distance guide, and find out the best time to visit Spiti Valley. If you’re up for adventure, try a 15-day bike trip from Spiti to Ladakh or even a Kedarkantha vs. Hampta Pass trek comparison.

Kashmir: Heaven on Earth

A Grand Himalayan Odyssey Exploring Leh Ladakh, Spiti, Kashmir, Goa, and Himachal

Next stop is the mesmerizing beauty of Kashmir, featuring Srinagar’s tulip garden, the dreamy Dal Lake, and stunning treks like Aharbal Waterfall. Learn how to be cautious during horse rides, prepare for different seasons, and find out what to carry for Kashmir travel.

Cultural insights include the Drung Waterfall, Chatpal village homestay, flora and fauna in Daksum, festivals in Gurez, camping in Bungus Valley, and a Kashmiri Wazwan food guide that you won’t want to miss.

Goa’s Tropical Escape

Switching gears to sun and sand, explore Goa with all its possible itineraries, fun at Baga Beach, and adventure sports like paragliding. Whether you love beach life or heritage, Goa adds a perfect balance to your mountain-heavy itinerary.

Shimla-Manali & Himachal Explorations

manali

Wrap up your journey in Himachal with a Shimla local tour guide, Shimla Kullu Manali trip options (including from Kolkata), and top experiences like Dhingu Mata Temple, Chadwick Falls, Sipi Fair in Mashobra, and cycling in Dhalli.

Feel the colonial charm of Gaiety Theatre, explore Lakkar Bazaar’s wooden crafts, and taste the best momos at Embassy Momos on Mall Road. Find Shimla’s local life, ice skating gear rentals, and best hotels near the Ice Skating Carnival. Don’t forget the iconic traditional Himachali Dham.

Complete Travel Tips

We’ve covered everything from packing the right clothing for a Ladakh trip to planning your Leh-Ladakh-Spiti-Zanskar trip with parents or pets. You’ll also find monthly travel plans for Zanskar Valley, gear checklists for bike trips with pillion, and even pet-friendly hotels in Leh.

Kheerganga Trek Difficulty Level

Kheerganga Trek Difficulty Level

Kheerganga Trek Difficulty Level

Kheerganga Trek is a popular trekking route in Himachal Pradesh. It includes mountain paths, waterfalls, green forests, and a natural hot spring. It is suitable for healthy and new trekkers, but some parts have steep climbs and rocky paths, which can be challenging. The trek is around 12 kilometers long and is located at a height of 2,960 meters. It usually takes 4–6 hours to complete. There are three main routes – Barshaini, Tosh Village, and Kalga. Among them, the Barshaini route is the most popular and easiest. Summer (April to June) is the best time to do this trek, but during the monsoon and winter, it becomes more difficult. Proper gear, physical preparation, and carrying enough water and food are very important.

What is the Kheerganga Trek, and why is it popular?

Kheerganga Trek Difficulty Level

Kheerganga Trek is a popular trekking route in the mountains of Himachal Pradesh, India. It is located in the beautiful Parvati Valley. The trek includes mountain trails, green forests, waterfalls, and a natural hot spring. The final destination, Kheerganga, is a unique and beautiful place where visitors can relax by bathing in warm water. From here, you can enjoy views of snow-covered mountain peaks. Because of its natural beauty and sense of adventure, it is one of the most popular trekking spots in India.

Is it suitable for beginners?

Kheerganga Trek is quite suitable for beginners. It is a relatively easy trek, where you have to walk around 10–12 kilometers. The path is hilly but not very dangerous. Since it is beginner-friendly, people who are physically fit and walk slowly can complete it easily. There are some steep climbs, which might be a bit challenging for new trekkers. But with proper preparation, beginners can have a great and enjoyable experience.

Difficulty Level of Kheerganga Trek

Kheerganga Trek is usually considered a medium-level trek. It is good for both new and moderately experienced trekkers. It is not very hard, but a few places have steep climbs and rocky paths, which can make it a little challenging. Anyone who is physically fit and patient can complete this trek successfully.

Personal Opinion

Kheerganga Trek was an unforgettable experience for me. When I went trekking for the first time, I had many questions in my mind. But after starting the trek, I realized how fun and amazing it can be. The path was sometimes flat, sometimes steep, and in some places, walking on rocks made my legs feel tight. But when I saw mountain rivers and waterfalls along the way, all my tiredness went away.
The best part was taking a bath in the hot spring after reaching Kheerganga – I felt deep physical and mental peace in nature. I chose the Barshaini route, which was very suitable and easy for beginners. Some places were a bit steep, but since I walked slowly, it wasn’t a big problem.

It was truly an adventure. I learned that it is important to be physically prepared and know the route before trekking. Also, don’t forget to carry water, food, and good-quality trekking gear – they are really helpful along the way.

Trek Route Length and Altitude

Kheerganga Trek Difficulty Level

The total length of this trek is about 12 kilometers, and the final destination, Kheerganga, is at an altitude of 2,960 meters (around 9,711 feet). Usually, it takes 4–6 hours to complete this trek, but the time may vary depending on a person’s fitness and pace. Because of the altitude, some trekkers may feel light-headed or short of breath, so it is wise to go slowly.

Type of Path

The Kheerganga trekking route is quite diverse. The path includes dirt trails, rocky paths, steep climbs, waterfall crossings, and narrow trails. In some places, the trail can be narrow and slippery, especially during the rainy season. Along the way, you will find beautiful forests, rocky paths by the river, and sometimes wooden bridges, which make the trekking experience even more interesting.

Who Is It Perfect For?

This trek is perfect for beginner and intermediate trekkers. Even those with no trekking experience can do it, but they need to be physically prepared. For complete beginners, walking slowly and taking breaks is important. For expert trekkers, this might seem relatively easy, but they can make it more challenging by trekking during snowy winter conditions. For beginners, it is better to avoid the monsoon and trek in summer or autumn.

Route Options and Their Challenges

There are generally three main routes for the Kheerganga Trek – the Barshaini route, the Tosh Village route, and the Kalga route. Each route has its features and challenges. It’s best to choose a route based on your fitness level and experience.

Barshaini Route – Most Popular and Easiest Route

The Barshaini route is the most popular and easiest path for the Kheerganga Trek. Most trekkers use this route because it is direct and relatively less challenging. The path includes beautiful green forests, small waterfalls, and scenic views along the Parvati River. Even with little trekking experience, it is easy to go through this route. However, there are a few steep sections that might be slightly tiring. This is the best option for beginners.

Tosh Village Route – Comparatively Difficult but Very Beautiful

For those who want to enjoy more scenic views and are ready for a bit of a challenge, the Tosh Village route is a great option. This route is comparatively difficult, as it includes some rocky paths and steep climbs. But from here, you can enjoy amazing views of the Parvati Valley, which are even more enchanting than those on the Barshaini route. Trekkers can also stay overnight in Tosh Village, which is a popular hippie hangout. However, this route might be a bit tough for beginners.

Kalga Route – Least Used but Comparatively Easy

The Kalga route is less popular, but it is an easy and peaceful path. This route is mostly used by experienced trekkers because it is less crowded and gives a chance to enjoy solitude in nature. The path is mostly surrounded by trees, which provide shade on hot days. But unlike the Barshaini route, the trail here is not very clear, so it can be confusing for first-time trekkers. For those who don’t like crowds and want a quiet trek, this can be a good option.

Which Route Should You Choose?

For beginners: Barshaini Route
If you like adventure and beautiful views, the Tosh Village Route
If you want a peaceful and less crowded experience, the Kalga Route
Each route has its beauty and challenges, so you should choose the right one based on your skills and comfort.

Physical Fitness and Preparation

To do the Kheerganga Trek, being physically fit and prepared is very important. Even though it is beginner-friendly, it can be hard to enjoy the whole trek without some level of physical fitness. You will need to walk for a long time and climb steep sections, so it’s important to prepare your body. Those who don’t usually trek or exercise should start preparing early to make the trek easier and more enjoyable.

What Kind of Fitness Is Needed?

The Kheerganga Trek mainly requires cardio, stamina, and balance training.

  • Cardio Fitness: Since you will walk a long distance and climb to high places, it’s important to improve your heart and lung strength. Activities like running, brisk walking, cycling, or swimming can help.

  • Stamina: Your body needs to be able to work hard for a long time. Walking or running for 30–45 minutes daily can help improve stamina.

  • Balance Training: Keeping balance while walking on hilly paths is important. Yoga, squats, lunges, and low-intensity strength training can help during the trek.

How to Prepare?

Preparing early will make the trek easier and less tiring for your body.

  • Pre-Trek Exercise: Start walking 5–7 kilometers daily at least 2–3 weeks before the trek. Slowly increase your walking time and distance.

  • Walking Practice: Practice walking on uneven ground to get used to trekking in hilly areas. If possible, try going up and down stairs to strengthen your leg muscles.

  • Backpack Management: You will need to carry essential items in your backpack during the trek. Practice carrying a 3–5 kg backpack while walking. This will make the real trek feel lighter.

People who focus on their fitness ahead of time will find the Kheerganga Trek much easier and more enjoyable. With proper preparation, your body will feel less tired, and you will be able to complete the journey nicely.

Challenges Based on Weather and Season

Kheerganga Trek Difficulty Level

The experience of the Kheerganga Trek depends a lot on the weather. The condition of the trail changes with the season, so it’s important to know which time of year is best. Usually, you face different challenges in summer, monsoon, and winter.

Summer (April–June) – Easy and Comfortable

Summer is the best time to do the Kheerganga Trek. The weather is mildly cold, the path is clear, and you can enjoy the green beauty around. It might feel hot during the day, but the nights are pleasant. There is no snow at this time, so the trek is easier for beginners. Summer is ideal for first-time trekkers.

Monsoon (July–September) – Slippery and Risky

Trekking during the monsoon can be risky because of heavy rain, which makes the trail very slippery. Dirt paths get muddy, river water rises, and wet rocks increase the chance of slipping. Still, if someone enjoys adventure in the rain, they can come during this season. But there may be issues like fungus and leeches, so carrying good trekking shoes and a rain cover is very important for safety.

Winter (October–February) – Covered in Snow, Tough Trek

In winter, the whole Kheerganga Trek is covered in snow, making it challenging. The temperature can drop below zero, making it hard to bear the cold. The path becomes slippery with snow, and it’s not wise to come during this time without trekking experience. But those who love trekking in snow and have experience can try it in winter. Warm clothes, gloves, and good-quality trekking boots are a must during this season.

Which Season Should You Visit?

Kheerganga Trek Difficulty Level
  • For beginners: Summer (April–June)

  • For adventure lovers: Monsoon (July–September)

  • For experienced trekkers: Winter (October–February)

If you’re doing the Kheerganga Trek for the first time, summer is the best season. The weather is comfortable, and the trek is easier. But if you want more of a challenge, you can go in winter or monsoon, with proper preparation.

Essential Gear and Accessories

To make the Kheerganga Trek comfortable and safe, it’s important to carry the right gear and accessories. Since this is a medium-level trek, you should carry some necessary items for safety and comfort:

  • Hiking Boots: Without strong and comfortable hiking boots, trekking will be hard. Good shoes with grip help on steep or slippery paths.

  • Rain Jacket: Weather can change anytime, so a raincoat or waterproof jacket is a must, especially during the rainy season.

  • Warm Clothes: It can get very cold at night or during winter, so carry warm clothes, a hoodie, or a jacket.

  • Backpack: Carry a lightweight but spacious backpack to hold all your essentials.

  • Headlamp or Flashlight: Sometimes the trek continues into the night, so having a light is important.

  • Gloves and Cap: In cold weather, gloves and a warm cap are needed to stay warm.

Trekking Challenges and Tips

Kheerganga Trek Difficulty Level

Kheerganga Trek is beautiful and adventurous, but there are some challenges to keep in mind. A few safety tips can make the trek easier and safer:

  • Low Oxygen Level (Altitude Sickness)
    Kheerganga is around 2,960 meters (9,711 feet) high. Some people may face problems like shortness of breath, headache, or tiredness. So, walk slowly and take enough rest.

  • Carry Enough Water and Food
    Staying hydrated during the trek is very important. Many people get tired or dizzy because they don’t drink enough water. Carry water and light snacks (like dry fruits, chocolates, energy bars) to stay energized.

  • Follow the Trail and Take a Local Guide
    There are different routes for the Kheerganga Trek, so there’s a chance of getting lost. New trekkers should follow marked trails, and if possible, take a local guide. This will help you stay on the right path and stay safe.

Personal Suggestions

Before going on the Kheerganga Trek, it’s very important to follow some safety tips and instructions to make your trek safe and enjoyable:

  • First, physical fitness is necessary. You need some level of fitness, especially to build stamina and improve heart strength. There are steep climbs and rocky paths, so prepare your body.

  • Second, carrying water and food is very important. Because you’ll walk a lot, your body will lose energy and water. So, drink water regularly and carry light food like dry fruits, chocolates, or energy bars.

  • Third, you should have a good idea about the route. There’s a chance of getting lost, so if possible, take a local guide. A guide will help you with the correct path and ensure your safety.

  • Fourth, be careful of altitude sickness. Since Kheerganga is at a height of about 2,960 meters, some people may face breathing problems or headaches. Walk slowly and take enough rest.

  • Fifth, prepare according to the weather and season. Summer is ideal, but in monsoon or winter, conditions can be tough. So, carry proper gear like a raincoat, warm clothes, and hiking boots.

Always be cautious and don’t try to rush or take risks. If you stay calm and connected with nature, the trek will be enjoyable and safe.


Chandratal Lake Trek Guide

Chandratal Lake Trek Guide

Chandratal Lake Trek Guide

The Chandratal Lake trek was an unforgettable experience for me. This heavenly lake in Spiti Valley, Himachal Pradesh, is located at 14,100 feet. To reach it, one must follow a tough but beautiful path. I started the trek from Batal via Kunzum Pass, and right from the beginning, I felt the thin air and the peacefulness of the mountains.

Along the way, I crossed rocky trails, snowy mountains, and small glaciers. It was thrilling but also challenging. To avoid altitude sickness, I walked slowly and drank water regularly.

The most memorable moment was when I saw the bluish water of Chandratal Lake for the first time—it was as clear as a mirror, with snow-covered mountains reflected in it. During camping, the night sky full of stars made time feel like it had stopped.

However, the weather here can change very quickly, so it’s very important to carry warm clothes and good trekking gear. Most importantly, to keep nature beautiful, one should avoid using plastic and littering.

Throughout the trek, I felt a unique sense of adventure that I will remember for the rest of my life.

Chandratal Lake

Chandratal Lake, also called the “Moon Lake,” is a stunning lake located in the Spiti Valley of Himachal Pradesh, India. It is situated at about 4,300 meters altitude, where the blue water meets the beauty of snow-covered mountains and open valleys.

Trekking to Chandratal Lake is a great experience for adventure lovers because the natural beauty around the lake is truly breathtaking! For those who enjoy high-altitude trekking in India, this trek should be on their bucket list.

Why Is It Popular for Trekking?

The Chandratal Lake trek route is very popular among trekkers. It offers a Himalayan trekking experience, and since the trail is relatively easy, it’s perfect even for beginner trekkers.

Usually, two popular routes are:

  • Chandratal Lake trek from Batal

  • Chandratal Lake trek via Kunzum Pass

On the way, you will see rocky mountains, small rivers, and the amazing natural beauty of Spiti Valley, which makes the trek even more attractive. For those looking for the best Himalayan treks in India, this is one of the top options.

Best Time for the Chandratal Lake Trek

Chandratal Lake Trek Guide

If you don’t go at the right time, you won’t be able to fully enjoy the beauty of the trek!

The best time for the Chandratal Lake trek is from June to September, when the weather is pleasant and the roads are open. During this time, the weather and temperature around the lake are quite normal, making the trek easier.

In winter (October to April), there is heavy snowfall, which closes the roads and makes the trek very difficult. So, those planning the trek should choose the summer season.

When Should You Go?

To enjoy the Chandratal Lake trek, it is very important to go at the right time. Due to changing weather throughout the year, trekking is not always possible. So, when is the best time to visit Chandratal Lake?

Generally, June to September is the best time, because the roads are open, the weather is pleasant, and the surroundings are at their most beautiful.

If you want to do the Chandratal Lake trek from Manali or the Batal to Chandratal Lake trek, this time is the safest and most convenient.

Personal Experience

The experience of the Chandratal Lake trek was truly unforgettable. When I first started from Batal, the Rocky Mountains and snow-covered peaks felt like I had entered a new world. The trail was not easy—sometimes it was rocky, and other times I had to cross small glaciers. But nature’s beauty was so mesmerizing that I forgot all my tiredness.

The most unbelievable moment was when I saw the clear, bluish water of Chandratal Lake. The reflection of the mountains on the mirror-like water made me feel like I was in a magical land. Camping at night was also amazing, with countless stars in the sky and deep silence all around. But since the weather can change quickly, warm clothes are a must. This trek wasn’t just a journey; it was a deep connection with nature—a truly unique experience.

Chandratal Lake Trek Route – Which Way to Go?

There are two most popular routes for the Chandratal Lake trek:

  • Via Kunzum Pass

  • From Batal

Both trekking paths are full of natural beauty and offer a good challenge for trekkers. For those searching for the best Himalayan treks in India, the Chandratal Lake trek route can be an unforgettable experience.

Start and End Points of the Chandratal Lake Trek

Those who want to do the Chandratal Lake trek usually start from Batal, a small village in Spiti Valley. It is known as a base camp for the Chandratal Lake trek.

Some trekkers also start from Kunzum Pass, which is more challenging due to its higher altitude.

  • Batal to Chandratal Lake trek distance: About 14 km, which usually takes 5–7 hours.

  • Kunzum Pass to Chandratal Lake trek distance: About 15 km, which takes 6–8 hours to complete.

Chandratal Lake Trek Duration and Distance

Even though this trek is not very long, it can feel difficult because of the high altitude. From Batal to Chandratal Lake, it’s possible to complete the trek in one day.

However, many trekkers choose to camp at Chandratal Lake and spend one night there, which becomes an unforgettable experience.

If someone plans the full itinerary, it usually becomes a 2–3 day trek, including travel, camping, and return.

Difficulty Level of the Chandratal Lake Trek

  • Batal to Chandratal Lake trek: This is an easy to moderate trek. The trail is rocky but not very steep, making it ideal for beginner trekkers.

  • Kunzum Pass to Chandratal Lake trek: This is a difficult trek due to the high altitude and lower oxygen levels, which can affect physical strength.

Alternative Routes and Popular Trekking Paths

Although Batal and Kunzum Pass are the most commonly used routes, some trekkers do the Chandratal Lake trek from Manali, which is much longer and usually planned as a 3–4 day trek. However, it is more difficult and mainly suitable for experienced trekkers.

If you are looking for the best time for the Chandratal Lake trek, then June to September is the best time, because the weather is favorable and the Chandratal Lake weather and temperature are suitable for trekking. So, if you want an unforgettable Himalayan trekking experience, then the Chandratal Lake trek from Batal is the best option.

Weather of Chandratal Lake Trek by Season

Summer (June–August) – During this time, the Chandratal Lake weather and temperature are the best. The daytime temperature stays between 5–15°C, the sky is clear, and the environment is ideal for trekking. The Batal to Chandratal Lake trek difficulty is relatively low, so this time is perfect for beginner trekkers.

Monsoon (July–September) – Although Spiti Valley doesn’t get heavy rain during the monsoon, some roads might get closed due to landslides. So, the Chandratal Lake trek route can be a bit difficult. However, those who enjoy monsoon trekking in the Himalayas may still choose to trek during this time.

Winter (October–May) – This is the off-season for the Chandratal Lake trek. After October, the temperature drops significantly, and after November, the entire area gets covered in snow. The Kunzum Pass to Chandratal Lake trek becomes completely closed. The Chandratal Lake temperature in winter can drop to around -20°C, so trekking during winter is not safe at all.

Safe Time for Chandratal Lake Trekking

If you want to know the safe time for the Chandratal Lake trek, then June to September is the best time to go. During this time, if you plan the Chandratal Lake trek from Batal or the Chandratal Lake trek from Manali, the roads are open, the air is bearable, and there are fewer problems due to high altitude. For those who want to do solo trekking in the Himalayas, this time is also ideal.

Challenges of Chandratal Lake Trek in the Off-Season

Those who want to do the Chandratal Lake trek in winter or monsoon may face some challenges:

In winter (October–May):

  • Due to extreme cold and heavy snowfall in Chandratal Lake, roads may be closed.
  • There is a risk of high-altitude sickness or a drop in oxygen level.
  • There is a possibility of hypothermia or frostbite during trekking.

In monsoon (July–September):

  • Some roads become slippery, which makes it a moderate to difficult trek.
  • There is a risk of landslides in Spiti Valley due to rain.

So, if you plan a Chandratal Lake trek itinerary, going between June to September is the best and safest option.

Permissions and Regulations for Chandratal Lake Trek – What You Need to Know

If you want to do the Chandratal Lake trek, it’s not just physical preparation that’s important. You also need to know about some important permits and regulations.
Chandratal Lake is in a protected area of the Spiti Valley, so getting the right permits for the Chandratal Lake trek before camping or trekking is mandatory.

Do You Need a Permit for the Chandratal Lake Trek?

Those who want to do the Chandratal Lake trek from Manali or the Batal to Chandratal Lake trek usually don’t need a separate trekking permit.
However, foreign trekkers may need special permission.

Chandratal Lake camping permit – Camping near the lake is not allowed, but permission is needed to stay at specific camping spots.
Kunzum Pass permit – If you’re trekking Kunzum Pass to Chandratal Lake, sometimes a permit is needed, especially if government rules change.
Spiti Valley inner line permit – Indian citizens do not need this, but it is mandatory for foreign tourists.

Where to Get the Chandratal Lake Trek Permit?


If you are doing the Chandratal Lake trek from Manali, then the permit must be taken from Manali.
Those trekking from Spiti Valley can get the permit from Kaza.

  • Manali Permit Office – Those coming from Manali can get the permit from the DC Office, Manali.
  • Kaza SDM Office – Those trekking from Spiti Valley can get the permit from Kaza.
  • Online Permits – Some permits are available online, so it’s good to check before going.

Protecting the Environment and Following Local Rules

Chandratal Lake is famous for its crystal-clear blue water and incredible beauty, so it is everyone’s responsibility to protect its environment. You must follow the Leave No Trace policy and not harm nature in any way.

What Not to Do:

Plastic waste in the Chandratal Lake area is banned – do not throw plastic or any waste anywhere.

Open campfires near Chandratal Lake are not allowed – campfires around the lake are completely prohibited.

Unauthorized camping near Chandratal Lake is not allowed – you cannot camp anywhere except at specific camping spots.

What You Should Do:

Use eco-friendly trekking gear that does not harm the environment.

Follow local guides and Chandratal Lake trek regulations.

Respect wildlife and the local culture.

So, if you are making a Chandratal Lake trek itinerary, be sure to be aware of the permits and rules. This will make your trekking experience better and help protect nature!

How to Reach: Journey to Chandratal Lake

Chandratal Lake Trek Guide

It is very important to know the correct route for the Chandratal Lake trek because it is located in the middle of the Himalayas. But don’t worry! Here is how you can easily reach Chandratal Lake.

Nearest Airport: The nearest international airports to Chandratal Lake are Delhi International Airport or Kullu (Bhuntar) Airport. You can take a direct flight from Delhi to reach either of these, then take a bus or a cab to Kullu or Manali. Kullu-Bhuntar Airport is about 50 km from Manali and is a good starting point for the Chandratal Lake trek from Manali.

Nearest Train Station: If you want to use a train for the Chandratal Lake trek, the closest station is Joginder Nagar Railway Station, which is about 160 km from Manali. From there, to reach Manali and then Chandratal Lake, you can take a taxi or a bus.

Bus Service: For those planning the Chandratal Lake trek from Delhi, buses are also a good option. The Delhi to Manali bus service is very popular, especially Volvo buses that run at night and reach Manali in the morning. From Manali, you can go by bus to Batal or Kunzum Pass, from where the trek begins.

How to Reach Manali, Kunzum Pass, and Batal: If you want to start the Chandratal Lake trek from Manali, first take a bus or taxi to Batal. From there, the Kunzum Pass to Chandratal Lake trek can begin. The total trek is around 55 kilometers, and the Chandratal Lake trek distance can usually be covered in 5–7 hours.

So, according to the Chandratal Lake trek itinerary, it takes some time and effort, but once you complete the trek, the amazing view will stay in your memory forever!

Essential Gear and Preparation: What to Carry for the Chandratal Lake Trek

Chandratal Lake Trek Guide

The Chandratal Lake trek is challenging but enjoyable, and good preparation is very important for a successful journey. While preparing your Chandratal Lake trek packing list, you must carry some essential gear because you will be in the middle of the Himalayas. Weather can change quickly, so you should be ready with the right clothes and gear.

Clothing and Gear According to Weather:

The Chandratal Lake trek weather can be cold or hot. So, the right clothing and gear are very important. You should carry:

  • Thermal innerwear

  • Waterproof jacket

  • Windproof jacket

  • Warm gloves, woolen cap

  • Hiking boots – strong and waterproof hiking boots are the most important gear for this trek.

  • Trekking poles – helpful for walking on hilly paths

Since it can get warm during the day in summer, also carry some lightweight clothes.

Camping Gear and Food:

Since the Chandratal Lake trek involves camping, camping gear is very important. You should carry:

  • Tent – light and waterproof

  • Sleeping bag – for cold Himalayan nights

  • Mat – to sleep on the ground

  • Stove & cooking gear – to cook food during the trek

  • Water bottles – carry plenty of water

For food, bring items that won’t spoil easily as Chandratal Lake trek food:

  • Instant noodles

  • Energy bars

  • Dry fruits

  • Tinned foods

Medical Kit and Emergency Gear:

A medical kit for the Chandratal Lake trek is very important. Small health issues may occur during the trek, so you should carry a proper first aid kit, including:

  • Pain relief ointment

  • Band-aids & gauze

  • Antiseptic cream

  • Medicine for altitude sickness

  • Diarrhea pills

  • Sunscreen & lip balm

Also, carry a power bank and flashlight/headlamp, so your phone stays charged and you can see at night.

If you are well-prepared with the right Chandratal Lake trek gear & packing, your trekking experience will be more enjoyable and safe.

Challenges and What to Do: What Problems Might You Face on the Chandratal Lake Trek?

The Chandratal Lake trek is an amazing experience, but you may face some challenges on the way. You have to deal with high altitude sickness, bad weather, and environmental challenges. But don’t worry! If you prepare early, you can handle these problems easily.

Physical Problems Due to High Altitude (High Altitude Sickness):

Since the Chandratal Lake trek is at a high altitude, high-altitude sickness can happen. Common symptoms are headache, low energy, and difficulty breathing. To avoid this, follow these tips. Since the Chandratal Lake trek altitude is high, go up slowly so your body can adjust. Staying hydrated helps reduce altitude effects. Avoid too much activity or running, especially if it’s your first time doing the Chandratal Lake trek.

Weather Challenges and What to Do

Chandratal Lake Trek Guide

Sometimes, the weather during the Chandratal Lake trek can be very difficult. There may be cold, rain, or even snowfall, especially in winter. So, it’s important to be prepared for the weather. Carry thermal wear, a waterproof jacket, and a windproof jacket to stay warm. Bring waterproof covers and extra warm clothes in case of rain or snow. Walking too fast in bad weather can cause breathing problems or illness, so go slowly and take breaks.

Wildlife and Environmental Challenges

There are different kinds of wildlife near Chandratal Lake, such as the Himalayan Black Bear, snow leopards, and many birds. Usually, animals stay away from people, but you should still be careful. Never go near their food or their homes. Follow the “Leave No Trace” rule to protect nature. Do not throw plastic or any kind of waste. Don’t make loud noises near Chandratal Lake to help maintain the peaceful environment.

Even though there are challenges on the Chandratal Lake trek, with proper preparation and care, you can manage them. With the right planning and awareness, your experience will be unforgettable.

Camping and Where to Stay: Where to Rest During the Chandratal Lake Trek?

The Chandratal Lake trek is a great adventure, and it’s important to know where you can stay. Camping is very popular during this trek. Since there are no hotels or guesthouses on the route, camping and local homestays are the best options. Let’s find out where you can stay and how to stay safe.

Camping Permission and Safety

There are some rules and safety tips for camping on the Chandratal Lake trek. Because it’s a high-altitude trek, you need a permit to camp. You can get this permit from the local authorities. Some trekking tour companies also arrange the permit, but you can confirm it yourself, too.

When camping, follow these safety tips:

  • Choose a safe camping spot so wild animals don’t come near.

  • Use safety tools like a flashlight, fire starter, and keep food and water stored properly.

  • To rest well at night, make sure you have proper gear like a sleeping bag and tent.

Nearby Homestays and Guesthouses

If you don’t want to camp and prefer more comfort, homestays and guesthouses near the Chandratal Lake trek are a good option. Places like Batal and Manali have local homestays and guesthouses. The local people are friendly and will help you learn about their culture. These guesthouses usually provide food and hot water. From homestays, you can also rent the gear needed for the trek and enjoy local food. When choosing a place to stay for the Chandratal Lake trek, always think about safety and the environment for a better experience.

Local Culture and Attractions: What Can You See Near Chandratal Lake?

The Chandratal Lake trek is not only about nature but also offers a glimpse into local culture and tradition. Since the trek is near Spiti Valley, you will see many different ways of life and cultural sights. Let’s find out what attractions you can explore on the way.

Nearby Tourist Spots

Very close to the lake, it offers amazing views of the Himalayas with snow-covered peaks. If you want to go deeper into Spiti, you’ll see beautiful nature, the famous Tabo Monastery, and other historical sites. Other scenic places like Batal, Kaza, and Key Monastery will make your trek even more special.


Local Food and Culture

The people around Chandratal Lake have a simple lifestyle and interesting food. Some common dishes include:

  • Thukpa (noodle soup)
  • Momo (dumplings)
  • Chha Gosht (a traditional meat dish)

By respecting their culture while eating, you can bond with the local people and understand their way of life. Especially in places like Kaza or Batal, locals are very friendly and welcoming.

You’ll also see Buddhist monasteries and holy places, which are an important part of the local culture and will make your experience even more memorable.

Personal Suggestions

The Chandratal Lake trek is a wonderful journey, but to make it safe and enjoyable, you must follow some important tips. The lake is at about 4,300 meters, so you need to climb slowly and take enough rest to avoid altitude sickness (AMS). The weather changes fast, so carry warm clothes, a waterproof jacket, trekking boots, and other necessary gear.

There are not many shops along the way, so take dry food and clean water with you. The road from Batal to Chandratal is rocky and tough. During the rainy season, it can be muddy and dangerous, so walk carefully.

Protecting nature is our duty, so don’t throw garbage and follow the “Leave No Trace” rule. Camping near the lake is not allowed, so only camp in permitted areas and follow local rules.

You can go part of the way by car, but because the road is rough, it’s better to go with an experienced driver. Also, carry a medical kit, medicine for altitude sickness, and emergency contact numbers.

If you follow these safety tips, your Chandratal trek will not only be beautiful but also safe and fun.